Sharks Tablet Cover
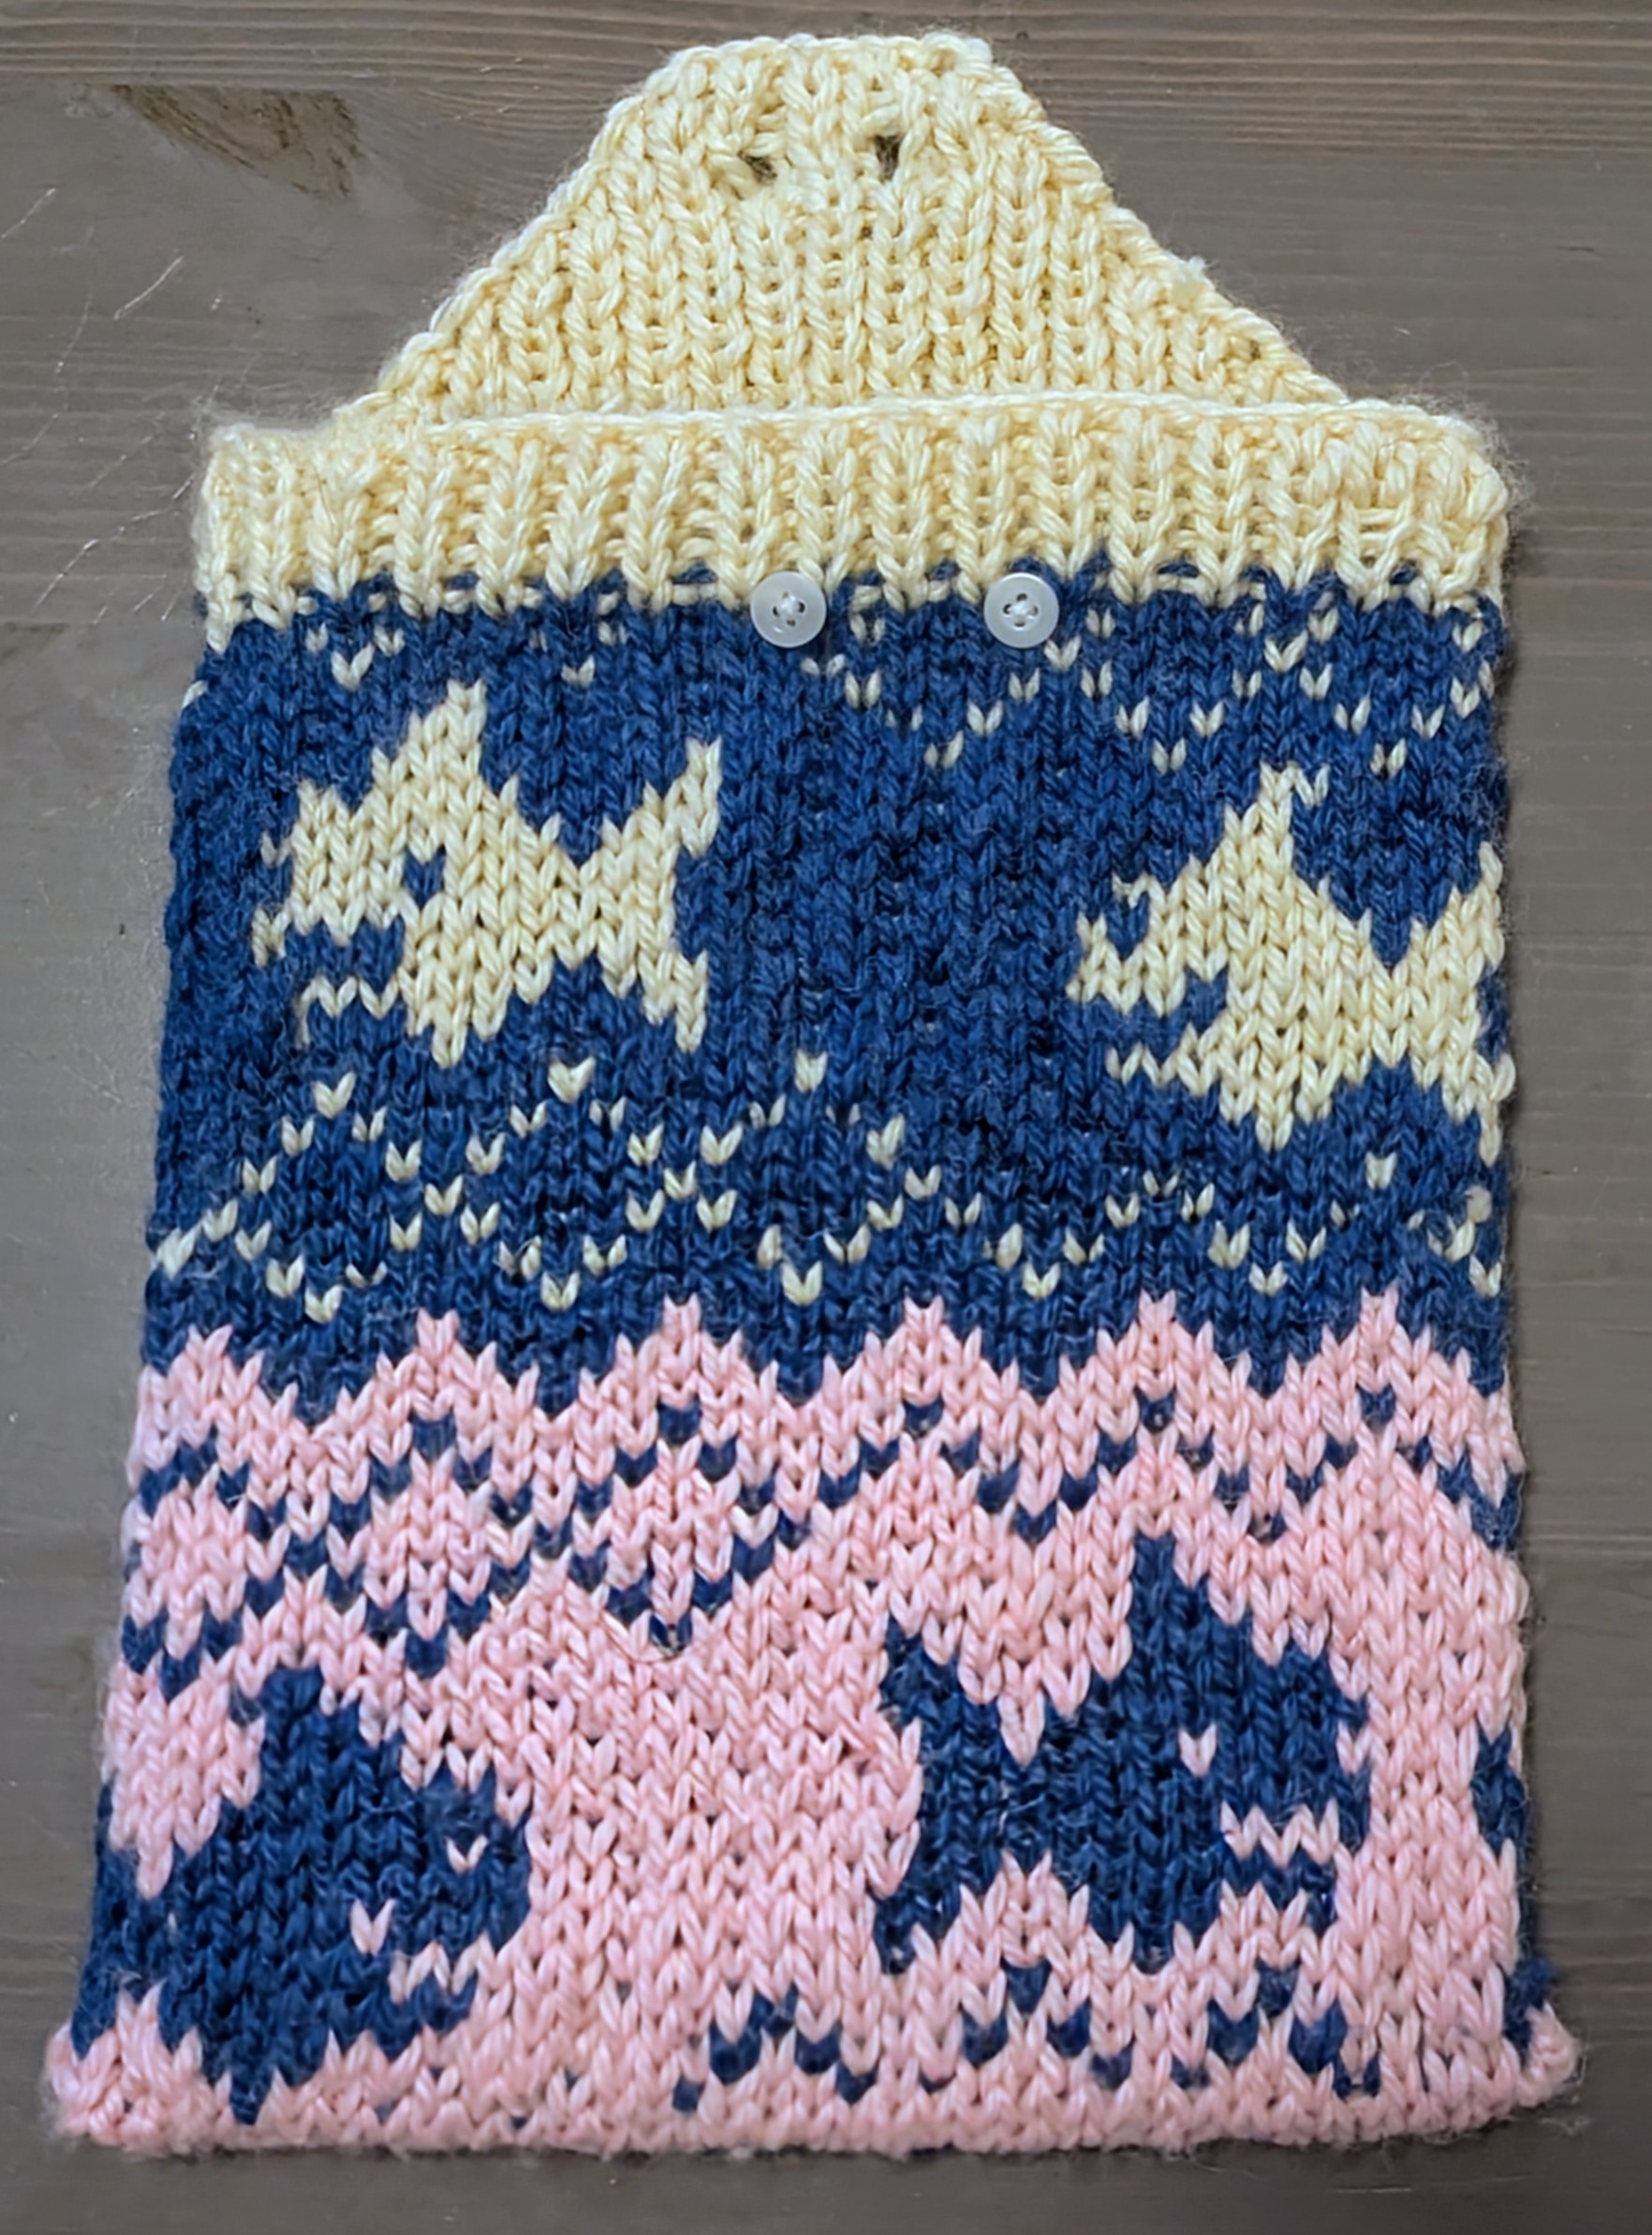
I'm very proud of my first pattern released on Ravelry back in July. It was a project I dreamt up years ago, and it's taken many forms since then. The 'final' form in the picture above is not actually the design in the PDF, I made some revisions after completing the first one, but haven't had time to find yarn to make another one. I was uncertain how much ribbing I would like, and how much extra height the lid adds, so those were modified in the final pattern uploaded to Ravelry after the project was complete. I also changed the pattern to accomodate two very small buttons instead of one regular-sized one, because that is what I had available. I think a single larger button will be more secure and more stylish, so I suggested that in the final pattern.
I put a lot of work into designing the pattern using two amazing LaTeX packages: tufte-latex to build papers that look like an Edward Tufte notebook, and knitting, a very succinctly named library for creating color charts and inserting knitting symbols. Both of these packages are so important to the final result, I'm going to give the maintainers special recognition:
Kevin Godby, an interface design specialist at Iowa State University, helped bring Tufte's unique, adaptable design philosophy to LaTeX. I think this provided my pattern with a very readable flow of information.
Ariel Barton is a mathemetician at the University of Arkansas and
created the extremely useful knitting package for CTAN. This package
is incredible. It has everything you could possible need for building
a lace pattern, color pattern, intricate cabling! I couldn't possibly
have typeset this all in Tex without this package, I'm not sure if
this pattern would exist without Barton's work.
Although originally deciding to put the pattern behind a paywall, which I still think is an entirely valid thing for designers to do, I've since reconsidered what this project actually meant to me, and why I wanted to release it. It really felt odd having a private git repository for this while simoultaneously selling the typeset document. Half of the fun of this project was learning about the intricacies of LaTeX and researching philosophies of informatics in order to create that document. But sharing the source code would be equivalent to making the pattern free, so I kept it closed source <shudders violently>.
I believe the more people that use this pattern, in any way, from just following the instructions to creating their own unique patterns, will make me happier, and I'm willing to test that theory by releasing the source code and a free, license-free, version of the pattern.
Shark Tablet PDF Shark Tablet Source Code
The rest of this article will go into some details about the design of the tablet cover itself as well as the design of the pattern with LaTeX. I want to make this accessible to both fans of LaTeX who have no knowledge of knitting, and fans of knitting that have no idea what typesetting is. I love it when two of my interests combine like this, and I hope everyone gets something out of it.
Building the source code
The most reliable way to build the document is using a Guix shell. A
shell is a (command-line) interface that wraps around a system with
various programs. In this case, the system is called Guix, and it will
contain all the programs needed to build the document. A configuration
file exists in the source code, manifest.scm, to tell Guix exactly
which programs are necessary, and from there Guix will build the
system and enter you into a shell. The command to do all this is
guix shell --manifest=manifest.scm
Unfortunately, setting up Guix is not a simple task, and, also
unfortunately, I don't have time to test setting up this project on
Windows or apt for Debian/Ubuntu or any other package
manager/operating system. However, the TeX Live website will walk you
through a simple way to install the necessary programs on various
systems.
Once you have set up your system, and have a shell open (terminal,
command prompt, etc) and you cd (change directory) to the location
of the source code, you can build the pdf file using the following
command:
latexmk -bibtex- -pdf shark-tablet.tex
This will print a lot of text, and create a bunch of files, hopefully
one of them will be shark-tablet.pdf. If not, read through the
output for missing .sty files, and find out how to use tlmgr to find
and download the correct files. Occassionally, the output might not
have all the information about an error, and you might need to look in
the file shark-tablet.log.
Once the pdf is generated, you can, optionally, clean up all intermediate files with:
latexmk -c
One of the best ways to learn a new software language is to modify the source code in small ways, that will not break the build process, in order to see the result. Open a text editor, like notepad or vscode, and try adding a hello message to yourself, change the title, etc. Just remember to keep building after every change, so you don't accidentally break it.
A trip around the source code
There are four tex files in the source code. The main file,
shark-tablet.tex, is named the same as the output file,
shark-tablet.pdf, and it includes the other three tex files as part
of its typesetting through the \input{} command.
The backslash, \, is a control character in tex files that denotes the start of a command. It is followed by an identifier, and then optionally braced parameters, with either square [] or squiggly braces {}. Some examples of commands are:
\author{Amy Pillow}
\vfill
\newcommand\kbx[1]{\Knit{#1}{#1}}
Most commands give you a sense of what they are by their identifier, and each of these commands has documentation available on CTAN.
Squiggly braces on their own are also control characters which denote a scope, in which changes to the document, such as choosing a different text color, are limited to the braced scope. The percent character, %, is yet another control character used to denote a comment that will not be interpreted by LaTeX, nor will it be printed in the final document, it is used solely to help readability of the source code. By convention, I use two %% to denote a helpful comment, and one % to temporarily disable a command or hide some text from the build process (at the time of writing, no single % comments are used).
The rest of the document, all the other text, is just that: text that will be typeset in the final document.
The Color Chart
The color chart was complicated to figure out. The front matter of the
color-chart.tex file sets up new commands that can be used later
on. The type of chart I was using used '-' for knit stitches and '='
for purls. However, the knit stitches are always white, or technically
clear. I had three colors to represent using purls and stitches (one
could be white), two at a time. So, the first few lines of the color
chart are with the dark boxes using the purl character, =, and white
boxes using the knit character, -.
Later on in the chart, I switched out the purl color for the third
color, using the \purlcolor{} command. Unfortunately, I couldn't
rely on changing the purl color for the second color change. The next
color change needed to drop the white color and use two different
shades. I wrote a command, \knitcolor{}, which is really a trick. In
reality, it defines a new type of stitch, ~, which is supposed to
represent a shaded knit stitch, but is actually just another type of
purl.
If I were to redesign the color chart from scratch again, I might try
to get rid of the knit/purl binary entirely through command
renaming. It's confusing in the context of a color chart where every
stitch is meant to be knitted. The reason I didn't was to stay
consistent with the API for the knitting LaTeX package, but in
hindsight this is very confusing.
To add to the complexity, the color change commands affect all rows below the command, while the chart itself is read from the bottom up, so the first two colors used are actuallly represented by the two shades of purls at the bottom of the chart.
The ability to draw purple lines around most of the chart in order to show where it repeats itself is useful, as is the ability to write the number of contiguous stitches of a single color, to avoid having to count a lot of boxes. Both of these abilities came built in, but I thought I would point them out because I believe they are extremely helpful when actually using the chart.
Why LaTeX?
I hate GUIs. Well, GUIs I didn't design.
Judy's Magic Cast-on
Once I learned about Judy Becker's method of casting on toe-up socks, I fell in love immediately. Published in 2006, this is a fantastic method for starting a sock, and what is a tablet cover if not for a very large sock?
The 'magic' in the name comes from the need to use a Magic Loop to pull it off. Bev Galeskas first described this method in 2002, but her friend Sarah has been using it far longer. Basically, by splitting the stitches, half on the needles and half on the long cable between them, you can easily exchange the two by sliding them around counter-clockwise as you knit. The loop of extra cable between the two sets of stitches acts as a divider as well as a handle to pull the stitches onto the next needle. Also, both halves of the stitches can be slid off the needles entirely and onto the cable, with the magic loop still between them, which is great for traveling.
I have been using both the magic loop method and Judy's magic cast-on for years, and I started playing with slightly different constructions. While the initial result was far more incredible than any other method of toe-up knitting I've tried at that point, there have always been parts of the method which seemed unneccessary to me.
In particular, the slip knot at the very beginning does not seem to be important to the overall structure. I started by casting on an extra stitch, then when I reached the slip knot on the first row, I would purposefully drop it off the needles. This removed a little knobby part of the fabric, that while it wasn't visible from the outside, still felt slightly different when squeezing. Eventually I figured out a way to not need a slip knot at all.
The other small annoyance about the method was the need to knit half of the stitches on the first row through the back loop. After a lot of trial and error, I determined that the reason this was necessary was that it was forcing a symmetry on the cast-on that actually needed to be broken in order to make the seam… well, seamless. I believe the reason for this was to make it easier to explain the method, which is really just as important as having an idea in the first place. So, I spent just as long figuring out the assymetrical cast-on as I did trying to explain it in a way that could be easily reproducible. This is what I came up with.
- Hold both needles together in your right hand
- Wrap the yarn around both needles 36x to determine tail length
- Pinch the working yarn, unravel it from the needles
- Hold on to the working yarn where you pinched it; wrap the tail over your thumb and index finger, creating a bar between both fingers. Make sure the tail is going over your index finger.
- Slide the bar between the two needles such that the top needle is closer to you. This will split the bar into a top and bottom strand.
- Bring the bottom strand up between the needles and wrap it over the top needle [1 sts]
- Wrap the top strand below the bottom needle and bring it down between the needles [2 sts]
- Repeat instrs 6-7 35x [72 sts]
- Turn the work, pull the top needle out
I have tested these instructions with an actual knitter as well as my fiancé, who doesn't know how to knit (yet!), and revised it based on their feedback. Is it different enough to deserve a different name? I'm not sure, but since my instructions are 'backward compatible' so-to-speak, I decided to leave the name so that experienced knitters can choose to try it my way or do it the way they are most comfortable with.
The finishing touches
The envelope-shaped lid has been redesigned multiple times. I always knew the basic shape I wanted, but how to get there was an entirely different challenge for me. From the resulting instructions, it's very hard to see why the envelope forms the way it does, even for me. I had to prove to myself that the algorithm was valid multiple times before I felt comfortable publishing it. I think the complication comes from switching from knitting in the round to knitting a flat flap, and that the entire lid is ribbed. Trust me though, follow the instructions intently and the result will be a perfect envelope for your tablet.
I've never really tested any of this
Time to come clean, I am a very sinister individual. The way I hold the needles is mirrored from almost everyone, including most other lefty knitters. I made extensive use of tools like https://www.mirrorthevideo.com/ to learn how to a lot of complicated knitting methods the 'wrong way'. In fact, if you look at the color chart, it is a mirror image of the final product. That's because I still read the chart from right-to-left, but I'm actually knitting left-to-right.
I've double and triple checked that everything in the pattern, and this blog post, are all exactly the opposite of what I actually do. Do what I say, not what I do!